N. S H A H R I S T E N B E R G
ORIGINAL ART MASKS


Foreword
This article is a kind of excursion into my artist workshop, into the process with all stages of creating a mask from scratch to realization. The story of how my masks appear from small sketches, margin notes, vague images and a great intention.
Step One - sketch
…It is always different. Sometimes I make a great many sketches, sometimes just a few.. sometimes thoroughly drown in details, sometimes even with no any drafts - in this case I let my imagination lead me through the process in every stage. It means - no limits!
As to this mask, it was in want of subtly detailed watercolor sketch. It is quite classic one, so I had to find the most pertinent and harmonious color scheme. But don’t forget about the composition, it turned out definitely bold - wingspan is about 36 inches


When all the details, nuances, size are picked out, the tablet, materials, brushes, paints, glue, varnishes, patina, paper, etc have to be prepared for working.
Step Two - sculpture
This is exceedingly laborious and important part of mask creation process, since much depends on the form, especially if we have detailed sketch. The mould has to be sculpted with all the heights, hollows, smoothness and roughness in mind. As well you should weigh up probable variations of the mask surface. I rely only on my own experience in such moments.

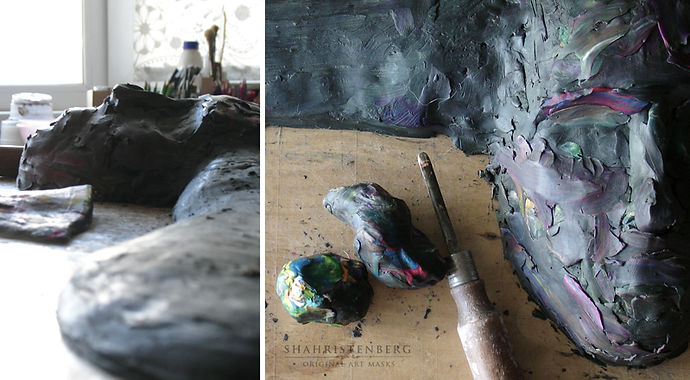

So, the masks blank is ready and we can move to the next step.
Step Three – paper and glue
Papier-mache. The very simple and very classic. Italians (Venetians) use plaster blanks when they replicate works. I don’t make copies and every form and shape is novel. But the basic technology of papier-mache is still the same, classic. Each piece of paper is glued manually, no paste or substitutes are used.
My experience shows that following the classic technology of papier-mache excludes deformation of mask. We can’t completely avoid it, but it’s minimal.

Then drying up. Final glueing. Drying up again – this time longer. It’s a quite time-taking process, which requires physical efforts, because it’s all made by hands.

After hand-grinding, we should putty some areas, then dry them up and grind again

Now we can proceed to working out the details and move further.
Step Four – prime coating
Soaking and prime coating is very important and strictly recommended before painting or coloring.
Put a layer of primer, let it dry, grind, put more primer, dry up again, grind... oh, yes, repeat as many times as needed..


Step Five – painting
For this work I used tempera and watercolor. I made some changes in the mask so it a little bit differ from its sketch. Color spectrum become more active, more saturated.. plus a little bit of patina and color tinting.


When the main tones, details, patina are applied it’s time for painting and finalization.


Step Six – back side
Final stage, which includes: grinding, making fasteners, signing, soaking, drying up, grinding, prime coating, drying up, tinting, drying up, grinding, and finally both sides varnishing

Step Seven – Final
100% done. Here it is!


This article is not a masterclass, but I hope it will inspire you to creative researches or making something with your own technology.
This is my little ode to my profession, to the opportunity of realization my ideas and to the happiness of living creative life.